What makes a good README?
Have a look at the README in your current project. How easy is it for anyone to get your project up and running from scratch? What does someone need to know about making changes to the codebase? Chances are, if your README is not providing definite and up to date answers to these questions, you’re making it harder than necessary for people to contribute and experiment.
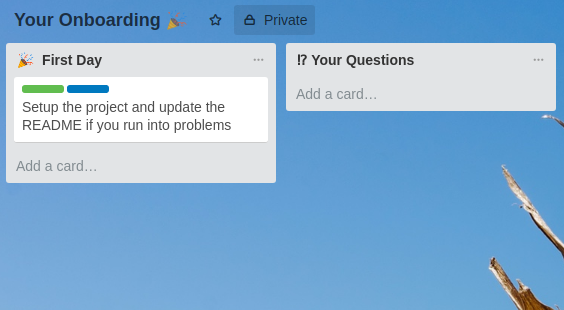
If you’re the newest hire in a company or their onboarding-buddy, here’s a good housekeeping task for both of you: Whatever project you need to setup on your machine, make sure to update the README and document all your findings as you set up the project. You reached your goal if someone completely unfamiliar with your project can set it up in a few minutes without major issues.
If you could use some guidance, the following post explains how I like to setup READMEs.
Let me encourage you to go the extra mile on this one, it will make life so much easier for everyone who would like to contribute to your project! 👌
🤔 Your project at a glance: What and how?
Your README is the first thing you see when you go on a project repository, be it on GitHub or GitLab. The first question it should answer is: Is this what I’m looking for?
What is the project good for? Is it the frontend? Is it the backend? Is it a collection of database migration scripts? If it is deployed, here’s a good place to put links to the deployments.
Name URL What is deployed live https://your-company.example Everything that is tagged on master will be auto-deployed here staging https://staging.your-company.example The latest master version, usually volatile and without live data pull_requests https://$BRANCH–staging.your-company.example Every Pull Request is auto-deployed
🚀 Prerequisites: What do you need to get started?
$ brew install nvm gnu-sed watchman  # Mac
$ yaourt -S nvm                      # Linux
There’s always something. You usually need to install a version manager (looking at you, nvm, rvm and such), docker or vagrant. If your dependencies need some specific setup, place the instructions here to make it visible before people start to setup the project.
It’s always a good idea to cover the major platforms and ecosystems your colleagues might have.
▶️ Running it - You need this all the time
$ git pull origin   # Get the latest changes
$ nvm install       # Make sure you're running the node version we need
$ npm install       # Make sure all dependencies are up-to-date
$ npm start         # Run the application
Why bother adding git pull here you may ask. The answer is simple: I want everyone in the company to be able to run the latest version of our project on their machine, so I rather mention one more “obvious” command than leaving them with an old version.
What I also do here (with nvm install and npm install), is to cover updating all the dependencies should they have changed.
🔎 Housekeeping / Troubleshooting
$ git checkout -f master  # Make sure you're on master and throw away all changes
$ git clean -xfd          # Undo all untracked changes you did
$ git pull origin         # Retrieve latest commit

$ nvm install             # Make sure you're running the node version we need
$ npm install             # Reinstall all dependencies

$ npm test                # Run the tests
$ npm start               # Does this work now?
This is the paragraph you need to make sure to narrow down if an issue is due to the codebase or the persons machine. Maybe they have unstaged changes or missing dependencies - or your latest revision contains a severe bug that keeps them from running the application.
Guide them through the process of cleaning up the repository, and, if everything else fails, explain where they should file an issue.
Make sure to warn them about commands like git clean -xfd or git checkout -f master though - these will remove all untracked files, even those ignored through .gitignore, and undo all changes they did to tracked files - possibly resulting in data loss.
As @hollodotme noted in the feedback to this post, this section can also contain FAQs to specific problems, e.g. errors due to wrong environment variables or explanations for less self-explanatory error messages and problems.
😍 Contributing
npm run test    # Run the tests
npm run build   # Try building the application
Now that you helped them get the project running, it’s time to explain what they need to observe in order to contribute to the project. Public repositories usually go for a CONTRIBUTE.md, a file that is also integrated into GitHubs Pull Request & Issue workflow, but in private repositories, it usually suffices to explain the steps necessary for people to get their changes into the app.
The most important questions to answer here are “Can I break something?” and if so, “How can I check that I didn’t break something” and “How do I unbreak the app?”.
Explain how to run the tests locally to verify changes. If you’re using a branching model, explain that contributions on a branch can not break the application running on a server. If you’re working with Pull Requests, explaining how your CI/Netlify/etc integration works will give the contributor meaningful feedback should they make a mistake.
⚙️ Development
By now, you should’ve covered the basic steps necessary to setup and run the application, as well as making some smaller contributions. Congrats! Now, for the rest of the README, our target group are your teammates, in particular the newest on the team 👋.
In this chapter, you’ll elaborate about the way you go about developing the project.
🚢 Shipping
Can’t believe I missed this when initially publishing this blogpost 😅.
CircleCI is taking care of building, testing and deploying our app. You can have a look at our
config.ymland the/deploymentfolder to get an idea on how it works.Basically, CircleCI invokes
npm run buildwhich builds the javascript and bundles it under/build. The/buildfolder and the appspec.yml, which describes how AWS CodeDeploy should deploy the application, are zipped and moved to a folder called /S3_UPLOAD/, which is then synced to S3. Afterwards, AWS CodeDeploy is triggered to deploy the artifact to our systems.
If you want people to deploy often and early, this chapter can not be missing from the README. It should cover how the deployment works and should link to important scripts and build steps that are involved with creating the project artifact.
If your CI is taking care of the deployment, linking to its configuration file and an example build will help people get a feeling for what is happening during a deployment. If you’re deploying by hand (😱), list all the commands and prerequisites here as well.
In case you’re not rolling forward, explaining the rollback process should be covered as well.
🔁 Processes
Document the virtues and values your development team agrees to here. How often do you want to deploy? How stable should branches (or master) be?
Maybe you are using a trunk-based development workflow, maybe your organization calls for tickets being made in order to track time and changes 😱, or your commit messages are supposed to follow the conventional commit history format.
This chapter should give new team members an overview about how you go about developing together on the project.
🔨 Tooling
The Tooling chapter should answer questions related to the tools you use every day while working on the project. There might be particularities with how the IDE needs to be setup, some precommit hooks that should not be omitted or docker images one can use in order to locally test the project in a more integrated manner.
💅 Guidelines for coding style, conventions
If you’re in doubt or implementing complex or critical features, please write a test that gives you (and future-you and me who will have to take care of maintenance) enough confidence in that it will notify us if the feature is broken (by failing).
The nit-picky part. What coding style should everyone adhere to? What is your definition of done when it comes to test-coverage? Avoid flawed Pull Requests by mentioning your quality expectations here.
If you have a particular way of structuring your modules and folders, explaining how to navigate through the codebase (maybe by giving an example), tremendously helps new team members in finding their way around the codebase.
The project structure is quite simple, adhering for the most parts to the way $FRAMEWORK does it. As a general rule, We try to keep conceptually coupled things as close to each other as possible - grouping files by how close they interact with each other (
/checkout-page), not by what they are ()./models
💡 Resources
If someone reaches this at the end of your README, you’ve done a good job and they might be longing for more information about your project. Now take a step back and think about what helped you getting started.
What are the resources you keep coming back to while developing, the resources that shaped the project in some way and of course resources that helped you learn the intricacies of the language your project is written in and the libraries you use the most?
Link to important 📖 blogposts and books, 🎥 talks to watch and 📂 repositories of the libraries you’re using. If there’s a good online course, add that to it as well.
What you’ll end up with
If you’ve followed the guide above, your README should now cover most of the steps needed in order to get started on your project - no matter if someone wants to correct a translation, fix a minor bug or develop a brand new feature. Your next teammate will be able to deploy on their first day on the job 🎉.
The last thing left for you now is to ask your next team member - on their first day on the job - to setup the project and document everything in the README, updating it as they go along and encounter problems.